Small online shops rarely have the budget or time for full studio shoots every time a new product idea appears. Yet clear visuals are still required to test concepts, show variations to suppliers, and decide what is worth producing. Image2.5 sits in a useful middle ground: fast enough for exploration, controllable enough for many early-stage decisions, and affordable enough that a single person can run the process.
This post focuses on how small shops can use Image2.5 specifically for product concepts—before large inventory commitments or expensive photography. The examples come from real projects with independent makers and micro-brands selling ceramics, packaged goods, and simple home products. The workflow stays practical and limited in scope so it fits the way small teams actually work.
Where Image2.5 helps small shops most
Image2.5 is strongest at three early-stage tasks:
Exploring product form and proportion before samples arrive
Testing simple packaging directions (label placement, material feel, basic structure)
Creating quick context frames that show how a product might sit in a real setting
It is less reliable for final hero e-commerce images that require perfect text or exact brand-matched styling. Treating it as a concept and decision tool rather than a final photography replacement keeps expectations realistic and results useful.
A simple concept workflow for one person or a tiny team
The process I recommend has five short stages.
Stage 1: Write a one-page concept brief
List only the decisions that matter for this round: core product shape, must-show features, material direction, intended use or setting, and what should be avoided. Keep it under half a page.
Stage 2: Lock a short product description
Write one clear paragraph that names proportions, surface quality, and key details. Reuse this paragraph in every prompt for the concept set so the product does not drift.
Stage 3: Generate a clean baseline
Create one simple product-only frame with neutral light and minimal background. This becomes the reference for everything that follows.
Stage 4: Explore two or three focused directions
Change only the variables you actually need to test—different packaging style, alternate material finish, or a simple context scene. Keep the locked product language identical.
Stage 5: Select and document
Choose the frames that answer the original brief questions. Save the exact prompts and a short note about what worked. This archive becomes the starting point for the next concept round or for briefing a photographer later.
Practical example: ceramic pour-over concept
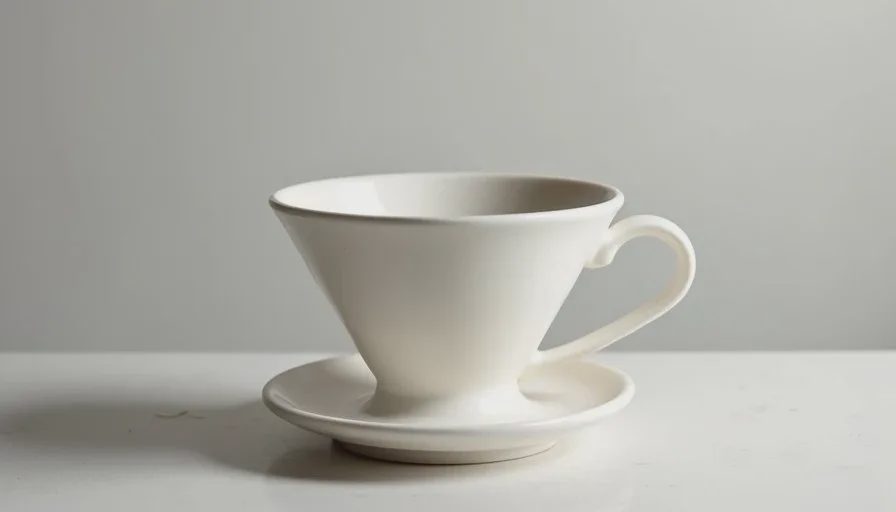
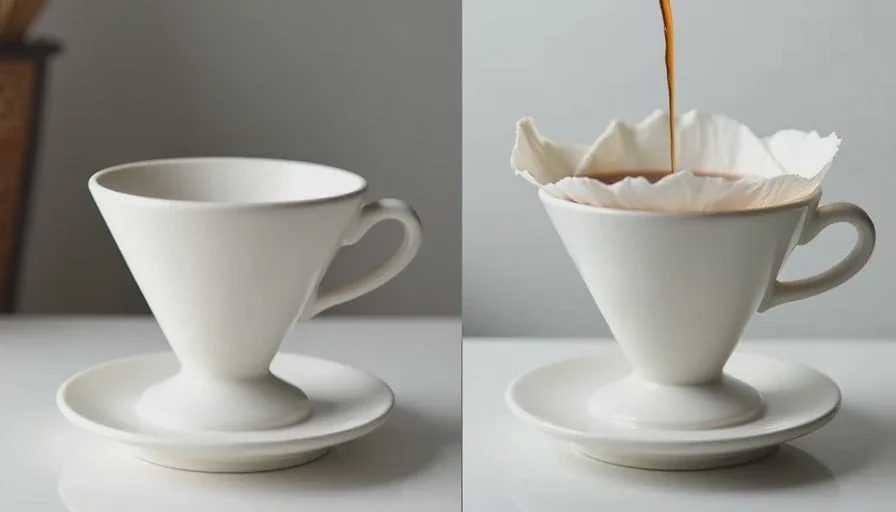
A small ceramics shop wanted to test a new pour-over shape before ordering a production run. The brief asked three questions: Does the conical form feel balanced? Does the matte glaze read as dry and tactile? Does the piece look believable on a simple kitchen counter?
I locked the product description, generated a clean baseline, then produced three context variations with the same core language. The frames quickly showed that a slightly wider base felt more stable and that the dry glaze needed stronger protective language to avoid a soft sheen. Those two observations were enough for the maker to adjust the next physical sample. Total active time was under two hours.
The images were never intended for the final product page. They served their purpose as decision tools.
What to protect in every prompt
Small-shop concept work fails most often when the product itself drifts. Three prompt habits reduce that risk:
Name the key proportions early and specifically
Describe surface quality in physical terms and add clear negatives for unwanted gloss or plastic appearance
Keep the product paragraph identical across the whole concept set
Lighting and setting can vary. The product description should not.
Realistic limits for current Image2.5 use
Text on packaging remains unreliable for anything beyond very short names. Fine structural details (exact foot shape, precise spout curve, small embossing) still need human checking. Color matching to existing brand materials is approximate at best.
These limits are manageable when the goal is concept exploration rather than final asset production. Many small shops use the Image2.5 frames to decide what to sample next, then move to real photography or supplier prototypes once the direction is chosen.
Time and cost fit for small operations
A focused concept round—brief, baseline, three variations, selection—usually stays inside a small number of generations and can be completed in a single focused session. That scale matches the way most independent shops already work: short decision cycles, limited budget, and the need to keep moving without waiting for external studios.
The main cost is the operator’s judgment. Clear briefs and locked product language matter more than prompt length or the number of generations.
A short checklist for the next concept test
Write a brief that asks only the questions this round must answer.
Lock one product description and reuse it.
Generate a clean baseline first.
Test only two or three variables.
Select frames that answer the brief and archive the prompts.
This sequence keeps the work small, intentional, and tied to real decisions.
Image2.5 will not replace product photography for most small online shops. It can, however, reduce the number of physical samples needed, speed up early form and packaging decisions, and give makers a clearer visual conversation with suppliers and collaborators. Used with a tight brief and consistent product language, it becomes a practical concept tool rather than a source of endless pretty but unfocused images.
Start with the decision you actually need to make. The generations stay useful from there.